Maya 3D Modelling And Rendering Iconic Designs - Extended
25-08-2022, 06:55 | 0nelove | Tutorials | 131 | 0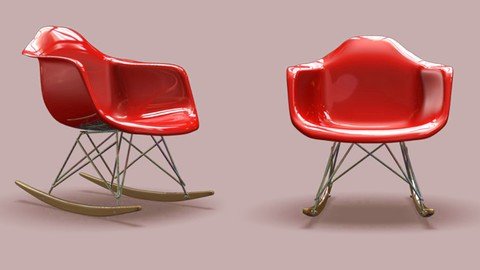
Maya 3D Modelling And Rendering Iconic Designs - Extended
Last updated 3/2017
MP4 | Video: h264, 1280x720 | Audio: AAC, 44.1 KHz
Language: English | Size: 1.54 GB | Duration: 6h 55m
Become a 3D Guru with this Maya Course great for Beginners and Intermediates
What you'll learn
You will be able to use Maya confidently
Have an understanding of rendering and render passes
Be able to tackle future solo projects confidently
Call yourself a 3D Guru
Understand basic modelling technique and execution
Requirements
I am using Maya 2013 but anything 2012 up should do
For some of the render pass sections I will be using Photoshop so having a version of that would be good however I supply all the Support reference
Description
Welcome to this course on 3D Modelling and Rendering this course is Jam Packed with features!. The course is an extended version of my course "Maya 3D Modelling Iconic Designs" it covers everything on that course and more showing many other tips and trick and techniques for both Modelling and Rendering!Who this course for?Anyone who need to learn quickly how to use MayaAnyone who want to learn great easy techniques for rendering with MayaBeginners and Intermediates who want to be 3D GurusThis course features lots of techniques and rendering you will find most courses don't show you how to get from step 1 to step 10 we do!Experts training future experts...See you in the lectures, have fun and learn.All the bestUK ONLINE TRAINING CENTRE
Overview
Section 1: Introduction and Promotion to the Course Maya Modelling and Rendering
Lecture 1 Promotional Video on Maya Creating Iconic design extended course
Lecture 2 Introduction to the course - What are we doing?
Section 2: Beginners Quick Shot course to using Maya!
Lecture 3 The Basics of Maya - Opening panels sets and Projects
Lecture 4 The Basics of Maya - Basic shapes and Navigation
Lecture 5 The Basics of Maya - Component Selection
Section 3: Maya 3D Modelling and Rendering Iconic Designs - Course
Lecture 6 Maya Iconic Design Course - Lets set up our project
Lecture 7 Maya Iconic Design Course - Chair reference images
Lecture 8 Maya Iconic Design Course - Setting up our reference image planes
Lecture 9 Maya Iconic Design Course - Box modelling our seat part 1
Lecture 10 Maya Iconic Design Course - Box modelling our seat part 2
Lecture 11 Maya Iconic Design Course - Box modelling our seat part 3
Lecture 12 Maya Iconic Design Course - Box modelling our seat part 4
Lecture 13 Maya Iconic Design Course - Finishing our Seat
Lecture 14 Maya Iconic Design Course - The Rocker part 1
Lecture 15 Maya Iconic Design Course - The Rocker part 2
Lecture 16 Maya Iconic Design Course - Taking a look at the wire frame reference
Lecture 17 Maya Iconic Design Course - Positioning the the parts
Lecture 18 Maya Iconic Design Course - Working on the wireframe
Lecture 19 Maya Iconic Design Course - Duplicating for the back wireframe
Lecture 20 Maya Iconic Design Course - Combining and Bridging
Lecture 21 Maya Iconic Design Course - Front wire cross support
Lecture 22 Maya Iconic Design Course - Creating the remaining struts
Lecture 23 Maya Iconic Design Course - Creating a weld and bolt anchors
Lecture 24 Maya Iconic Design Course - Finishing our frame
Lecture 25 Maya Iconic Design Course - Refining our Rocker
Lecture 26 Maya Iconic Design Course - Scene cleanup
Lecture 27 Maya Iconic Design Course - Adding shock absorbers
Lecture 28 Maya Iconic Design Course - Creating a hole in simplified geometry
Lecture 29 Maya Iconic Design Course - Positioning and merging our Hole to the Rocker
Lecture 30 Maya Iconic Design Course - Creating a Bolt Head and Nut
Lecture 31 Maya Iconic Design Course - Position out Bolt and Nut
Lecture 32 Maya Iconic Design Course - FInishing our chair final tweaks
Lecture 33 Maya Iconic Design Course - Scene Clean Up
Section 4: Maya Iconic Design Rendering Course
Lecture 34 Maya Iconic Design Rendering Course - What are UVs?
Lecture 35 Maya Iconic Design Rendering Course - Basic Maya Materials
Lecture 36 Maya Iconic Design Rendering Course - Surface Normals
Lecture 37 Maya Iconic Design Rendering Course - Creating a custom Camera
Lecture 38 Maya Iconic Design Rendering Course - Camera Parenting, Keyframing
Lecture 39 Maya Iconic Design Rendering Course - Render using Maya and mental ray
Lecture 40 Maya Iconic Design Rendering Course - Lighting
Lecture 41 Maya Iconic Design Rendering Course - Increasing Quality in Mental Ray
Lecture 42 Maya Iconic Design Rendering Course - UV layout for our Rocker
Lecture 43 Maya Iconic Design Rendering Course - Texturing our Rocker
Lecture 44 Maya Iconic Design Rendering Course - HDRI Enviroments a quick look
Lecture 45 Maya Iconic Design Rendering Course - Why use Mental Ray Materials?
Lecture 46 Maya Iconic Design Rendering Course - Mental Ray Material Render
Lecture 47 Maya Iconic Design Rendering Course - Setting up Passes
Lecture 48 Maya Iconic Design Rendering Course - Compositiong in Photoshop
Section 5: MAYA COURSE HELP CENTRE
Lecture 49 Maya Help Centre - Introduction
Lecture 50 Maya Help Centre - Axis, transform and freeze
Lecture 51 Maya Help Centre - What are NURBS
Lecture 52 Maya Help Centre - NURBS Revolve
Lecture 53 Maya Help Centre - NURBS Curve types
Lecture 54 Maya Help Centre - NURBS Loft part 1
Lecture 55 Maya Help Centre - NURBS Loft part 2
Lecture 56 Maya Help Centre - NURBS Birails
Lecture 57 Maya Help Centre - NURBS Poly conversion
Lecture 58 Maya Help Centre - Outliner, groups and parenting
Lecture 59 BONUS LECTURE
This course is for Beginners to Intermediates however advanced users could benefit
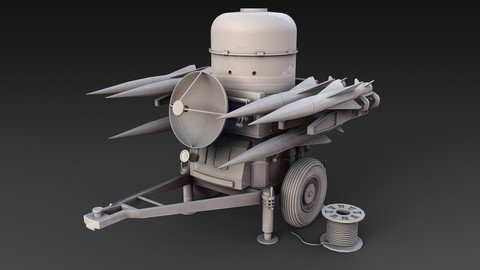
Screenshots
Https://anonymz.com/?
https://www.udemy.com/course/maya-3d-modelling-and-rendering-iconic-designs-extended/]Https://anonymz.com/?
https://www.udemy.com/course/maya-3d-modelling-and-rendering-iconic-designs-extended/
#
https://uploadgig.com/file/download/b95A0B8a10D648b7/Maya_3D_Modelling_and_Rendering_Iconic_Designs_Extended.part2.rar
https://uploadgig.com/file/download/c5383e52D135ebe0/Maya_3D_Modelling_and_Rendering_Iconic_Designs_Extended.part1.rar
https://rapidgator.net/file/bf411afb8a2b9795cf51a39876a67ef8/Maya_3D_Modelling_and_Rendering_Iconic_Designs_Extended.part2.rar.html
https://rapidgator.net/file/ddcd58c45a1fe69cf583692a793914a2/Maya_3D_Modelling_and_Rendering_Iconic_Designs_Extended.part1.rar.html
https://nitroflare.com/view/F2F46A424BAA22F/Maya_3D_Modelling_and_Rendering_Iconic_Designs_Extended.part2.rar
https://nitroflare.com/view/A5A90ADEEC54793/Maya_3D_Modelling_and_Rendering_Iconic_Designs_Extended.part1.rar
We Recommend To See:


The minimum comment length is 20 characters. Respect yourself and others!